Per-Character OCR from analog video with TensorFlow
Preface
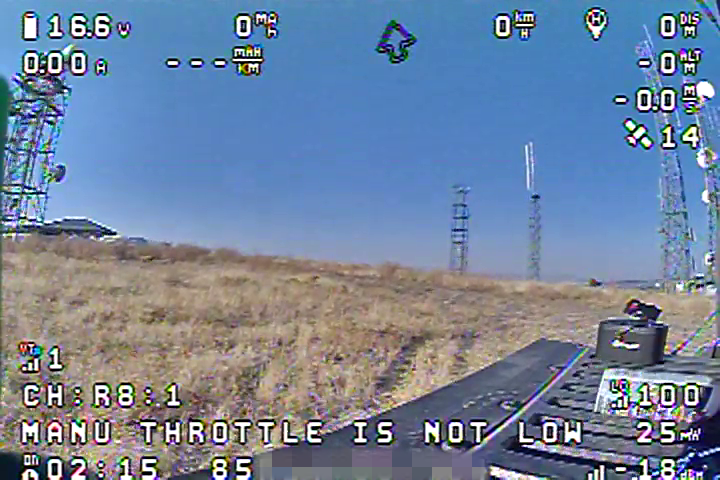
I have a hobby flying first-person-view (FPV) planes and quadcopters. When flying FPV, it’s sometimes nice to reflect back on your previous flights and see what spots on the map you touched, what you flew over, how fast you went, etc. Generally, we use a radio telemetry link which records flight parameters to the radio controller we fly with, and can pull out a clean CSV then process it into nice-looking maps and data collections.
I like to fly from some very interesting places. In this case, the flight was conducted from a mountaintop using a 900MHz telemetry link at 0.014W (14mW) power, where the mountaintop also contained a 150,000W EIRP ~500MHz TV transmitter. While these are very different frequencies, the raw power difference is enough to horribly desensitize the relatively-wideband telemetry radio receiver, so telemetry only lasted for a few hundred meters before dropping off (where it should go a dozen kilometers with ease).
What options does that leave us? Well, the video feed (NTSC/PAL analog video over 5.8GHz) was pretty solid through the entire flight, and the video feed contains an ASCII string known as a Plus Code or OpenLocationCode which encodes a GPS latitude, longitude pair into a single ASCII string using a 20-letter restricted set of characters. Could we read these with OCR?
Initial approach
I started with the Tesseract library, an all-in-one OCR toolkit with pretrained models. I fed in the string and…
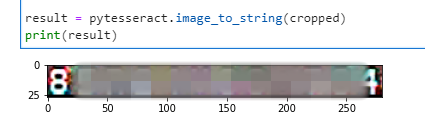
Nothing. Okay, maybe it’s trying to make dictionary words. Let’s try breaking it out by cropping on a single character, add some image processing (thresholding) to make the letters pop more from the background, then run Tesseract in a different mode over each character, then append it into a string
We’re getting results now! Unfortunately, they’re all very wrong. So what’s the problem? Well, Tesseract is trained on a certain set of fonts, which this particular OSD font is not a part of. Looking around, the procedure to set up new fonts is available, but not super straightforward, and I couldn’t shake the feeling this was a square peg to the round hole that Tesseract presented. What else could I try?
Enter TensorFlow
I’ve previously done some image classification projects in TensorFlow. These have always been fairly complex models, dozens of layers deep, transfer learning, thousands of training data images cropped to 224x224, etc. If you looked at this project in the right way, what I needed was an image classification system that operated on single characters extracted from a noisy analog video feed. A ground-up convolutional neural network would be massively overcomplicated for the task at hand, the proverbial freight train hauling your groceries home, but would it work?
I mentioned this project in passing to a friend one evening, and set it aside for the time being. Tesseract took me about 30 minutes to try out, but this would be a few hours at least, and obtaining these data was by no means critical. I’d stick it on my project backlog and come back to it eventually.
A capstone project
A few weeks later, my friend reaches out, saying he needed a capstone project using AI/ML to wrap up his degree. Could he use the footage I had and try the TensorFlow approach, and would I be willing to mentor him through it? Of course! Let’s get started.
Generating our training data
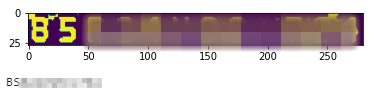
We started by taking my code from above which segmented characters, and generated a set of training data. A few thousand random characters were pulled from the video and saved as small 17x27 greyscale PNG files. These images were then loaded into a labelling tool, Universal Data Tool. From there, we labelled 1000 samples manually over the span of an hour, and exported our labelled dataset, so our output looked something like 1000 iterations of this.
 = 4
= 4
Creating our dataset
Now we had 1000 samples where an image corresponded to one of the 22 possible classifications - either a known letter in the 20-character OLC format, a plus sign, or an unknown, unreadable character. We’ll encode the outputs of this training data as onehot, which looks like a 1D array with 22 indices, where each index has a value from 0 to 1 which corresponds to a confidence for that particular class.
With the samples loaded into a TensorFlow Dataset object, we chose to then partition our data with a 70% train, 30% validation split. This was important to be certain we didn’t overfit the model, and that the model would generalize.
Creating the model
Here we had a handful of approaches available to us. While some might suggest starting from an established mnist model which function on handwritten digits, we figured starting from scratch with a ConvNet model would be interesting - if it didn’t perform, we could stand on the shoulders of giants and use one of the mnist approaches.
We started with a model I had created from scratch for previous classification tasks, then stripped out many of the layers and reduced the complexity of the remaining ones. What we ended up with was this:
Model: "sequential"
_________________________________________________________________
 Layer (type)                Output Shape              Param #
=================================================================
 rescaling (Rescaling)       (None, 27, 17, 1)         0

 conv2d (Conv2D)             (None, 27, 17, 8)         80

 max_pooling2d (MaxPooling2D  (None, 13, 8, 8)         0
 )

 conv2d_1 (Conv2D)           (None, 13, 8, 16)         1168

 max_pooling2d_1 (MaxPooling  (None, 6, 4, 16)         0
 2D)

 conv2d_2 (Conv2D)           (None, 6, 4, 32)          4640

 max_pooling2d_2 (MaxPooling  (None, 3, 2, 32)         0
 2D)

 flatten (Flatten)           (None, 192)               0

 dropout (Dropout)           (None, 192)               0

 dense (Dense)               (None, 16)                3088

 dense_1 (Dense)             (None, 22)                374

=================================================================
Total params: 9,350
Trainable params: 9,350
Non-trainable params: 0
Note the shape of the input and output layers - the input is shaped for a 27x17 image (vertical first per convention) and a greyscale single color channel. The output is a softmax activated dense layer with our 22 possible classes, which will give us a onehot vector as previously discussed.
We compiled our model with CategoricalCrossentropy as our loss function, and an adam optimizer.
Fitting
For fitting the model, we decided on a batch size of 32. The model would be trained on CPU for him, since he didn’t have a CUDA GPU available (though I do in the image below), and the training workload was small enough to be extremely fast on CPU anyway. We’d run it for 10 epochs and see how the performance came out.
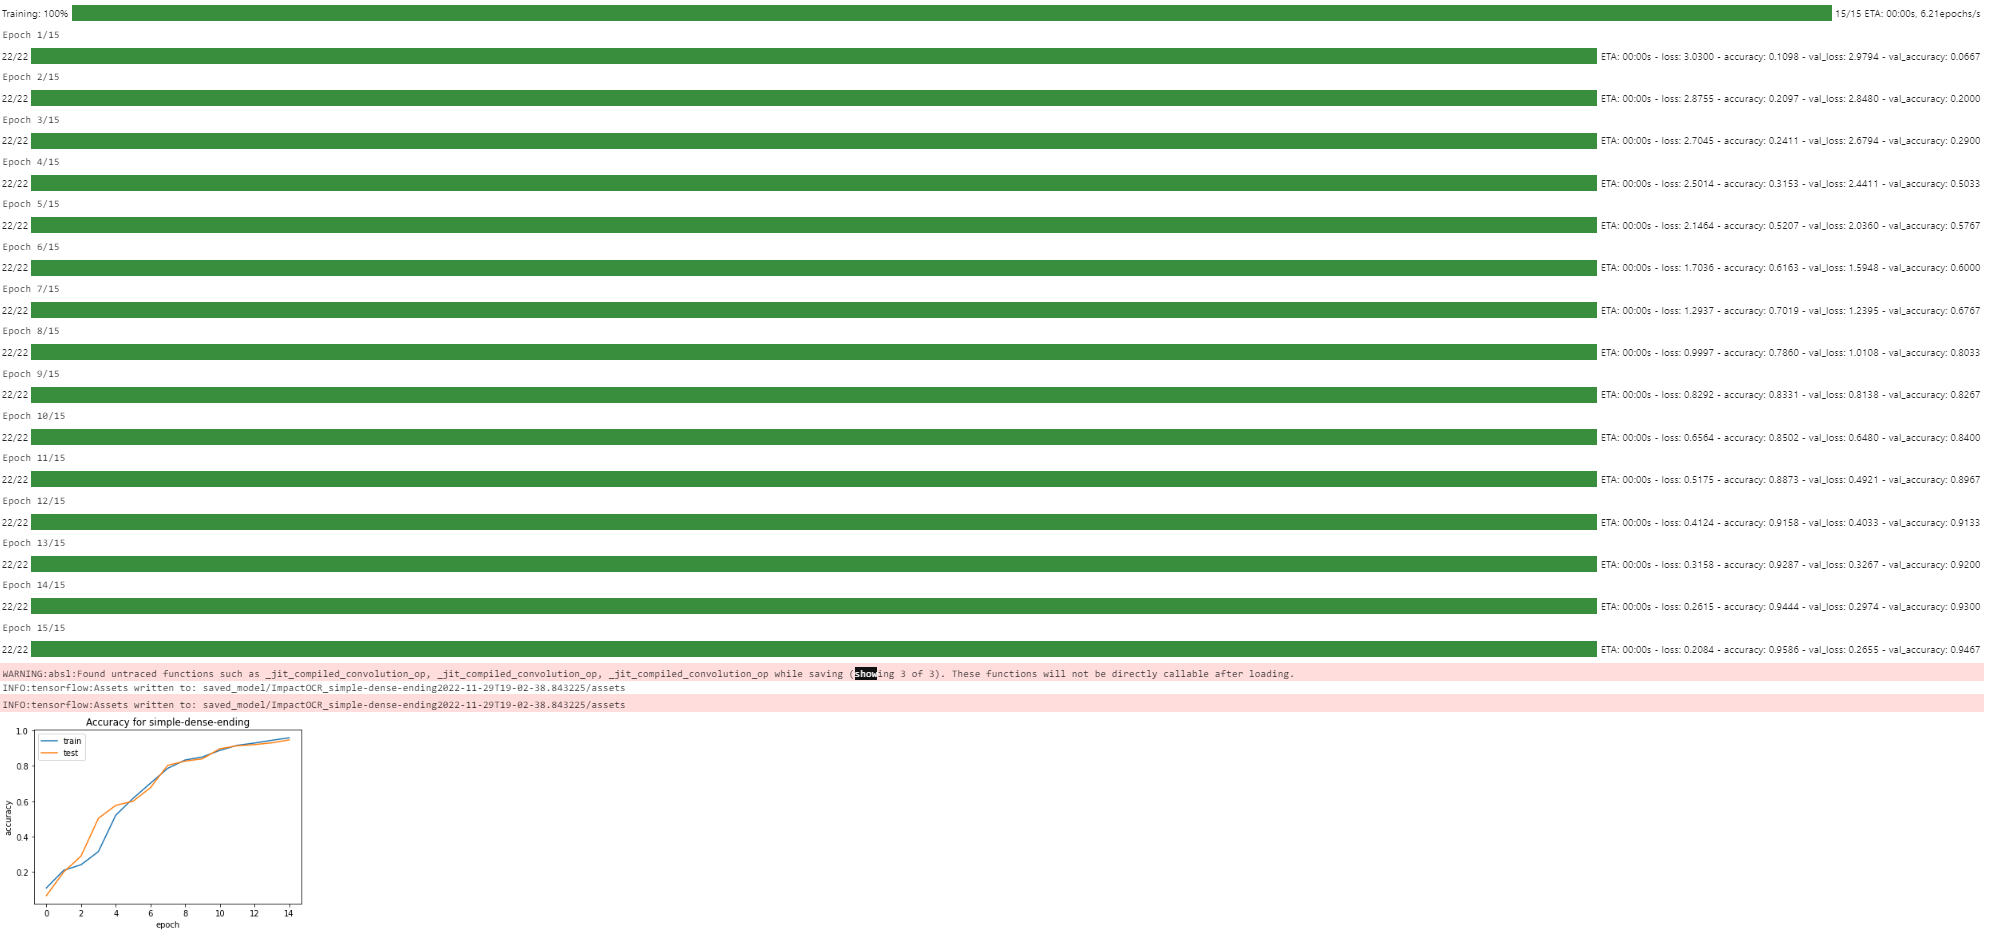
Wow, it trained ridiculously fast (~3 seconds total) and achieved a ~95% accuracy on the validation data. That’s astoundingly good for a first try. We ended up trying a few dozen tweaks, different optimizers, different model styles, and eventually came out with a 99.5% accuracy on our validation dataset (I didn’t yet copy the tweaks we made to improve the model to my own machine, so you’ll have to trust me).
Making the data useful
Okay, now we had a model which would classify individual characters. Let’s stitch all of them together and see if we get plus codes. If we do, let’s decode them and put them in a CSV file.
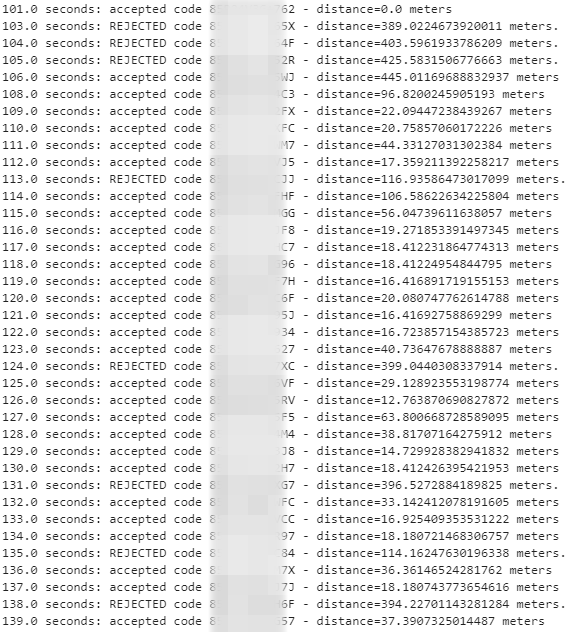
Here you can see a few things: lines with gaps in the timecode indicate a frame that was unable to be parsed as an OLC at all, and were rejected early. The ones with the word REJECTED were thrown away because they indicate too much movement in too short a time - for example, 300m/s, which is 1000km/h. This simple validation ended up rejecting about 6% of total extracted plus codes, and only about 1% of the remaining codes were erroneous, and then only by a few dozen meters which was not material to the goal at hand.
Visualization
Let’s see how this looks! We exported the located latitudes and longitudes as a CSV and imported them into Google Earth. Shown below is a cropped down image showing just the takeoff of the flight.
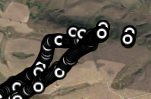
A success! We were also able to calculate an average speed through the flight by deriving it from our position data, and export that as a graph (though that code, like the final model design, I didn’t get a chance to copy back to my own machine).
Next steps
My friend was able to submit this project as written and achieved his degree successfully. Alas, we still want to make improvements to this design. First, we’d like to also read the altitude OSD element, visible in the top-right. Next we’d like to improve our accuracy by synthesizing the input data; the live data contained some bad patterns, such as a lack of C & G characters, which represented a significant portion of our errors. We’d like to use the font files available in the flight control software and generate a larger volume of already-labelled training data with artificial noise rather than hand-labelling thousands more images. Finally, we’d like to train this approach on all the common fonts used in FPV so this approach would work on any video from any flight control software.
Conclusion
A full ConvNet TensorFlow model is overkill for single-character optical character recognition, but the results speak for themselves. I’d like to explore this approach further and implement the improvements I spoke about above. I’ll post a followup if that does end up happening. Safe flying!
Postscript
Fun fact, I ran into this bug on the VM I use to build my website while putting together this blog. Clear your btmp files if SSH is slow for no reason and strace of the sshd is looping tightly on read().